Fiddling around? Violins need precise bridge locations

Bridge placement is a big deal on a stringed instrument. Adjusting your violin bridge affects the actual playability of the instrument. If the bridge is too far forward, you will raise your strings higher than is comfortable to play.
If the bridge is too far back, you could possibly make the string height too low relative to the fingerboard and therefore cause string buzz and string muting.
Additionally, the placement of your bridge determines whether or not your instrument has the correct intonation. For example, let’s say you’re a pro and you’ve got your fingers in the right place and your string is in tune.
If your bridge is in the wrong place, it could cause your correctly placed fingertip to produce an incorrect or out of tune pitch.
That’s right. That’s how important this CAN be. Now, lucky for us, this doesn’t happen too often because the violin has given us indicators on where to place the bridge.
For our purposes, we are going to assume that we are not changing the strings. So go ahead and loosen them enough to relatively easily work with your bridge.
Additionally, don’t let off ALL the string tension because it can lead to the release of tension on the sound post (that’s inside your violin underneath the E string) and cause it to fall over. Now, moving forward…
The bridge on my violin looks like a Ski Slope
Yep. And that’s why you’re a violinist, because you’re intelligent and observant (go ahead and pat yourself on the back).
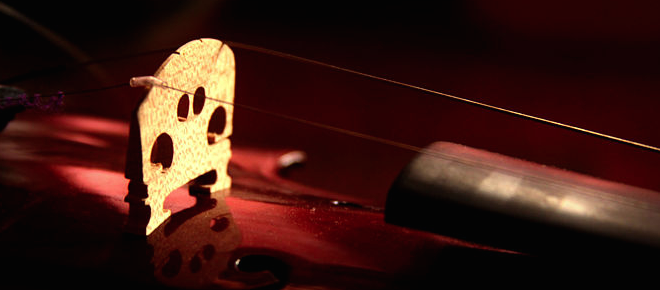
Notice how the ends of the top of the bridge (the rounded part of the bridge that is the vertically opposite side of the “feet” of the bridge) are not equal? In other words, one is lower than the other.
This is NORMAL. Well, at least nowadays (we can discuss that later). Now hold your violin in your lap with the TOP of the violin facing up towards you. Place the side of the bridge that is the lowest (not the tallest) on the RIGHT side of the violin.
Remember, the bridge needs to be vertical (straight up and down) and the feet will sit flush (flat) on the violin. If the feet are not flush, that’s another issue that we will deal with later. For our purposes, lets assume they sit flush.
Violins have fun with “F” Holes

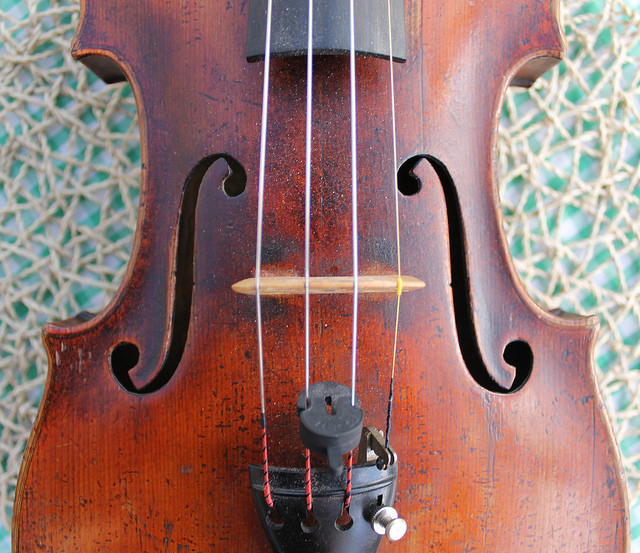
The first order of business is to locate your “F” holes. Yeah, not my first choice on the name. Don’t get me started. But that’s what we’re stuck with. So, locate those holes and you’ll notice that there are little notches in the middle of the shape of the “F” holes.
If you are holding the violin and looking straight down on the top of the instrument, you will see these notches on both sides of the “F” holes. We are only concerned with the ones that are on the inside of the “F” holes, closest to the bridge.
Place the bridge underneath the strings (if you haven’t already), put the strings in their respective string slots on the bridge and line up the feet of the bridge with the “F” holes, and you’re on your way to producing correct intonation.
When the bridge is tight, it should be right (angle)

Ok, now that we’ve got the bridge under the strings, lets make sure that the bridge is vertical. Take either a 12 inch ruler or something of similar dimensions, like a business card that has a 90 degree angle.
Place it behind the bridge, on the side of the tailpiece and make sure that the bridge is flush against the business card so that the bridge is at a 90 degree angle with the top of the violin.
This MAY look like the bridge is slightly leaning backward toward the tailpiece. Due to the way the fingerboard side of the bridge is cut, that’s normal.
What’s actually happening is the tailpiece side is perfectly straight, but the fingerboard side is slightly rounded backward toward the tailpiece.
Now, go ahead and slowly tighten the strings of the violin equally until you get close to the proper tuning of the instrument (E, A, D, G).
If at any point, the bridge begins to lean too far forward, stop tuning the instrument and repeat the 90 degree angle/business card/ruler protocol.
THIS IS IMPORTANT: You do NOT want your bridge to fall over. If this happens, there is the possibility that the feet will break. It’s not likely, but I have had it happen before. Rule #1 is to protect your instrument as much as possible.
Final thoughts
Your bridge is important to the function of the violin and it’s sound production. Therefore, we want to make sure it’s set up properly. Check your bridge from time to time to keep it in tip-top shape!

